Tracking a Screen in Mocha AE
In After Effects, make sure that the framerate for the video you want to track has the same framerate as the rest of the video (if you’re using multiple videos).
Control/Command-click the timeline in AE to switch it from “Current Time” to “Frames”. Mocha does everything in frames, not time, so this will help match everything up.
In After Effects, put your clip in the timeline. Go to Animation > Track in Mocha AE. This will open Mocha AE.
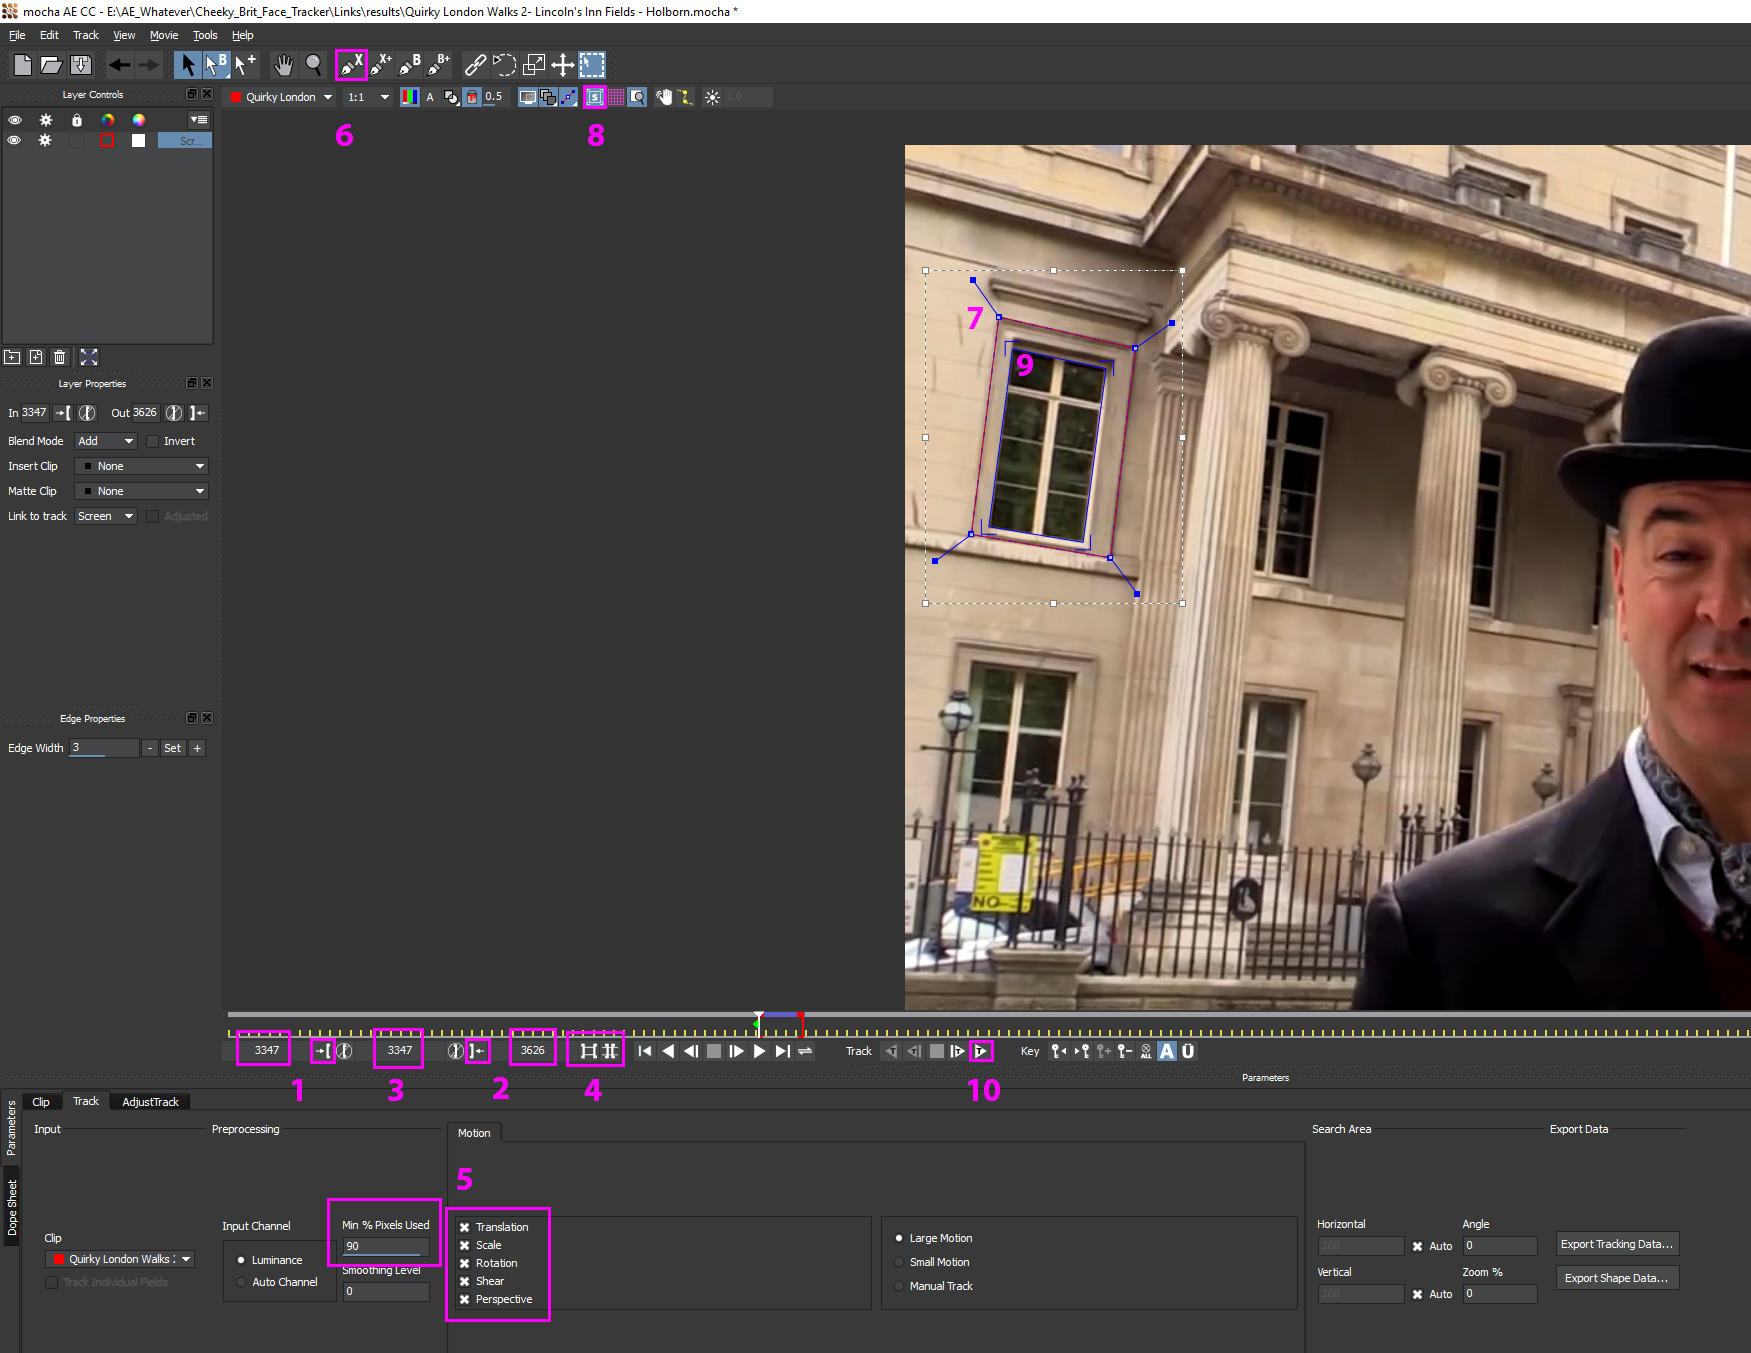
See below for 10 basic steps for getting your tracking going.
- Set your in-point using the numeric thingy or by scrubbing to a certain spot and clicking the in-point button.
- Do the same for the out-point.
- This is the current frame you’ve scrubbed to, FYI.
- Use these tools to zoom either to the whole video, or to your in/out points.
- Set Min % Pixels Used to 90%. More % means more accuracy (it takes longer, too, of course). Check all 5 Motion boxes to get all that sweet, sweet tracking accuracy. As you track you may need to turn these on or off, since Mocha sometimes bugs out depending on what is within the tracking region you’ll set in step 6.
- Click this X-Spline tool.
- Draw your box around the OUTSIDE of the area that will be used as the “screen”. Drag the blue lines to make the corners sharp.
- Turn on the planar surface. This is the thing that defines the actual perimeter for the visible screen overlay.
- Drag the planar corners to the desired screen area.
- Start tracking!
Notes so far:
- Mocha AE is a planar tracker, not a point tracker. That means that when you track a box and a point goes off-screen, Mocha will still track the edges attached to the point (I think that’s how it works, anyway).
- You can turn any of the “Motion” variables on or off at any point during the tracking. Use the Dope Sheet tab (bottom part of screen), twirl open Screen > Track and delete any bad points. Then uncheck any trouble variables in Motion and re-track the frames with the regular tracking triangle buttons.
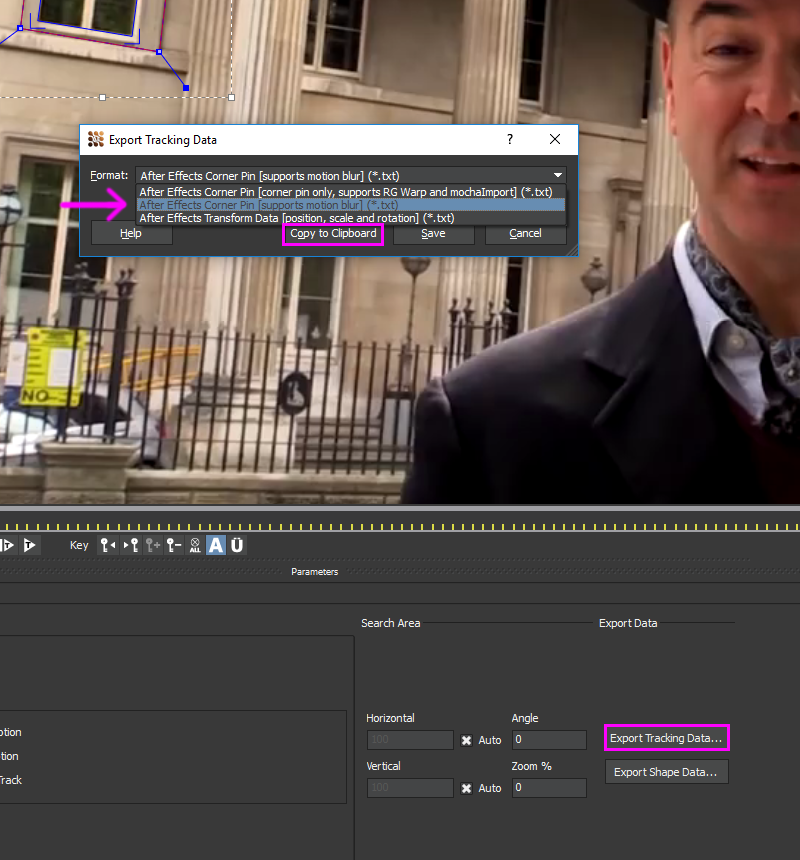
So you’ve tracked that window. Good for you! Time to export the data. Click Export Tracking Data, select the option shown below (After Effects Corner Pin – support motion blur) and Copy to Clipboard.
Now go back into After Effects.
Toss your image onto the timeline and convert it to a pre-comp (right-click > Pre-compose).
Double-click this comp.
To ensure the planar surface from Mocha AE will match your fake screen, you must do two things:
- In the Composition Settings for the new composition, make sure the new composition itself (not the image inside) has the same dimensions as the main video.
- Now select the image in the new composition. Go to Layer > Transform > Fit to Comp. Your image will now be 1920×1080 (or whatever the video’s resolution is) and look all stretchy. But that’s OK!
Finally, paste in that tracking data. First go back to the main comp.
Make sure the scrubber is at the same first frame as the one you tracked in Mocha AE so that everything synchs up.
Select the new comp. Press Ctrl/Command-V. Your picture should automagically snap into place!